

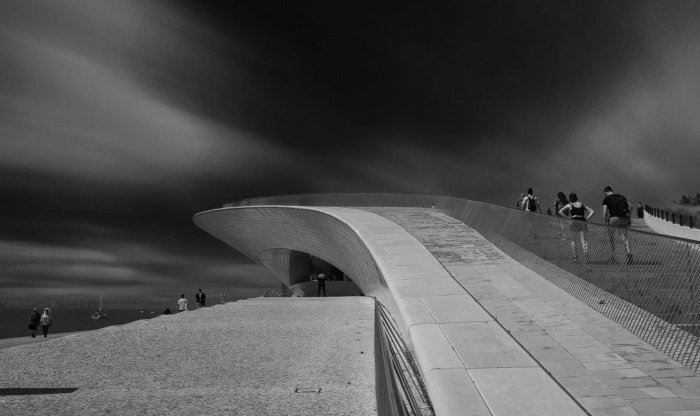


Black-and-white photography allows you to discover the ordinary picture anew. Color falls away, and the details that might have been easy to overlook become the leading characters in an image. You’ve got the contrast, the line of a shadow, the roughness of a wall, or the face of a person standing out. The monochrome conversion simplifies cluttered compositions and provides a stronger visual mood.
When you are wondering how to make a picture black-and-white, you can rely on modern post-processing tools. Editors like Luminar offer dedicated controls for converting an image and adjusting how its original colors translate into different shades of gray.
In this guide, we will walk our readers through online monochrome conversion in Luminar step by step. You will find practical tips and interesting ideas on making your images more balanced and expressive.
Step 1: Choose the Right Photo
Monochrome photography begins with a picture that stands on its own through great composition. Consider if the photo will still be compelling without the color. If the answer is yes, you can move on.
Look for clear differences between light and dark areas, interesting textures, strong shapes, or a subject that stands out from its surroundings. Adjust the tones of the original colors to make these elements easier to distinguish. Pay particular attention to highlights and shadows because they will remain the only character-shaping elements at your disposal.
Step 2: Upload Your File
When you have a suitable photo, Luminar offers a straightforward way to convert an image to black and white online. First, import your file into the Luminar workflow. For the online workflow, the browser-based Luminar experience is being introduced as part of Skylum’s 2026 updates, allowing photo editing through the web. But it only works within the cross-device ecosystem, meaning you need to purchase and install the software first.
Step 3: Apply Conversion
Find an online tool to convert images to black-and-white. It is clearly labeled “Black & White” in Luminar. Then, choose conversion. Do not be too quick to judge this image, as Luminar’s default automatic conversion is often unflattering. For example, the nicely tonally balanced details in color now may be too bright, too dark, or simply less clear. But don’t fret, everything can be improved, so proceed to the next step.
Step 4: Adjust Color Channels
Black-and-white photography tips recommend working on color channels after conversion, and Luminar makes it possible. Users can determine how the original reds, yellows, greens, cyans, blues, and magentas translate into shades of gray. For example, adjusting the blue channel can change the brightness and separation of a sky. You can redefine the overall tonal balance without reintroducing colors you don’t need.
Step 5: Add Contrast
If the result still feels flat, apply some black-and-white photography techniques to add depth. Begin raising the contrast step by step, paying attention to the brightest and darkest parts. When the shadows are completely cut out or the highlights lack detail, Luminar edits non-destructively. So you can undo the change and adjust or reapply the adjustments to suit your style. A subtle contrast can make the image look quiet and cozy, while a greater tonal range can make it more expressive.
Step 6: Emphasize Structure
Then, consider texture and structure. When you don’t have a colorful subject to provide visual contrast, textures such as stone, wood, fabric, or clouds may jump out at you. Repeated shapes and lines, patterns, and reflections or shadows may jump out at you. A little sharpening can help your photo, but don’t go overboard, especially if the grain doesn’t align with your aesthetic.
Step 7: Use Selective Adjustments
Some specific areas of your image may lose detail after conversion into monochrome. In Luminar, it is possible to address these areas specifically without altering the whole look. For example, you could keep a subject slightly brighter while letting the surrounding shadows remain deeper. The modifications should be restrained, so ensure they match the overall composition and aren’t noticeable immediately.
Step 8: Preview and Save
Before saving your finished image, take a moment to view it as a whole. The subject should be the first thing you notice, and the details should be clear in the darkest and the brightest areas. Ensure there are no overly harsh contrasts or distractions. Compare the edited photo to the original in color by toggling the Before/After. If removing color makes the image clearer, more focused, or better suited to the mood you had in mind, the conversion is doing its job; you can save and share your work.
Conclusion
Black-and-white editing is not simply about removing color. It is a way to bring attention to light, texture, shapes, and the details that give a photograph its character. With Luminar, you can start with a simple conversion and then fine-tune the tones to suit the subject and mood. Ready to experiment? Open your next favorite photo in Luminar and see what you can discover when color is no longer part of the picture.